
Have you ever wondered how to set up and use a portable Oxygen (O2) detector? These little devices might seem unassuming, but they play a critical role in ensuring your safety. Portable O2 detector is like the guardians of your Oxygen supply, especially in settings where Oxygen levels can fluctuate. Whether you're in an industrial workspace, a medical facility, or confined quarters, understanding how to properly set up and operate these detectors and monitors is essential for maintaining a safe and healthy environment. An example Oxygen gas detector is Gas Dog handheld gas detector designed to monitor and detect the presence of Oxygen (O2) levels. In this article, we'll take you through its parameter settings to make sure you can confidently use your portable O2 detector to keep you and those around you safe.
Getting Started with a GasDog Portable O2 Gas Detector
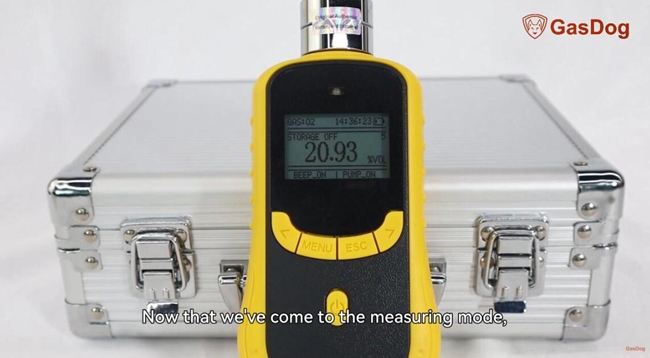
1. Measuring Mode
We come to the measuring mode. All the information we can get from the LCD. Hit the MENU button to go to the detailed page. So the first menu item is alarm point set and let's hit the power button to select it.
- Here you can adjust the low and high alarm values as needed. Press the arrow buttons to revise the figures upward or downward and you can move to the other digits by pressing the MENU button and making your adjustment in the same manner.
- Continuously pressing the MENU button moves to the high point section and repeats the same operation procedure as in the low point section.
- Once you're done with the modification, keep in mind to press the power button to confirm your action, otherwise, your modification will be canceled.
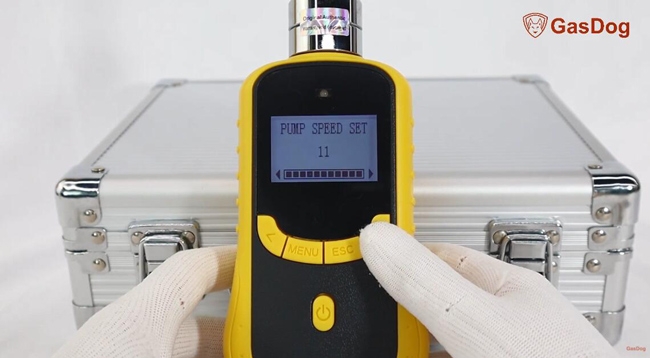
2. Pump Speed Setting
Next, let's move on to the pump speed setting. There are a total of 11 speed settings in this detector. The higher the pump speed, the greater the vibration it'll be generating. Confirm your selection and escape to the main menu.
3. Zero Calibration and Span Calibration
The next two options are both concerned with calibration: Zero calibration and Span calibration. These two steps are necessary for a full calibration of this portable O2 gas detector.
- Zero calibration is to be carried out when the drifting is too large after the reading is stable or once there's an alarm happening. To activate this function, you're gonna need to enter the password. Please contact us if you need the password.
- Span calibration, also known as target point calibration, involves applying the standard gas of a specific known concentration to the sensor without atmospheric dilution. The calibration result should be the concentration of the standard gas.
These two calibration steps require rigorous operating conditions. Therefore these steps need to be done by qualified professionals with necessary accessories and standard gas. The detector must be calibrated regularly so as to make sure that each time you enter the detection area the device has already been calibrated.
4. Date & Time Setting
- Scroll down the menu and go ahead to the next option, that is, the date and time setting, here you can modify the specific date and time of your measurement.
- All you need to do is hit the MENU button to change to different sections including year, month, date, hour and minute, and in each section, you can revise the figure by pressing the two arrow buttons.
- Then these figures will be modified successfully once you press the power button to confirm.
- Going back to the main menu, what we have next is the Language Setting in which you can select your preferred language. Besides other languages can be customized.
5. Gray Level Setting
Following that is the Gray Level Setting. In this item, you can adjust the backlight to achieve the desired visibility. Don't forget to press the central button to confirm your action.
6. Detector Restore Setting
Restore Setting is useful when the user wants to reset all the parameters or there's something wrong with the instrument like the alarm keeps going off and cannot be stopped. This function needs you to enter a password to activate it because it's not advised to use this feature if the detector works properly.
7. Storage Function
In the storage set, you can enable or disable this function by hitting the Right arrow button. It should be noted that the storage function is turned off by default every time the device is turned on, so if you want to track the results of the gas detection instrument, you need to manually enable this function.
Press MENU button to navigate to the storage interval where you can set the specific value like 5 sec, 10 sec, 15 sec and up to the max 1 hour. As always, confirm your selection by pressing the on/off button.
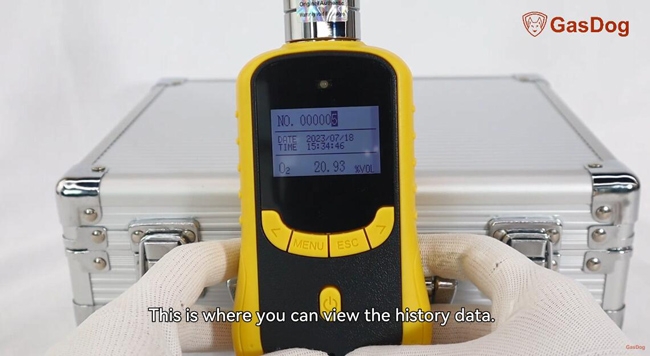
8. View History Data
- Escape from this interface and enter the next sub-item. This is where you can view the history data. The display will give you four lines of information. The first one is data coding telling how many records have been created so far.
- Changing codes allows you to review these records that contain the exact readings as well as their specific date and time. And if you want to erase all the history data, just enter this menu option and input the password 9999, then confirm it.
- The gas detector will beep once and display "erasing", then the records have been erased once for all and the device will return to the measure mode automatically. We recommend that you clear the history data regularly so that there will be enough storage room for the detector to work properly and you are also enabled to review the records more easily.
In conclusion, the proper setup and use of a GasDog portable Oxygen (O2) detector are paramount in numerous situations where Oxygen levels are critical. In addition to this portable Oxygen gas detector, GasDog also offers GD300-O2 and GD700-O2 fixed single gas detectors, they act as your unwavering sentinels, working silently to monitor and alert you to any Oxygen concentration variations that could pose a risk to health and safety. By following the manufacturer's instructions and regularly calibrating and maintaining your detector, you can use it with confidence across a diverse range of applications. Ultimately, these devices can ensure you and your environment stay safe and secure by keeping a watchful eye on Oxygen levels.
This is how to set up a portable O2 gas detector before taking a gas detection. If you would like more details on the GasDog gas detector and monitor, click on the video below:


